Springs might seem like just another piece of your coil tattoo machine, but don’t sleep on ‘em. These little strips of metal have a major say in how well you pack color, pull bold lines, and nail those buttery smooth blends. If your machine’s not hitting the way you want, your springs might be the culprit. So yeah, knowing how to tweak, adjust, and choose the right spring setup for your style? Kinda essential. Let’s break it down.

Springs 101: How a Coil Tattoo Machine Works
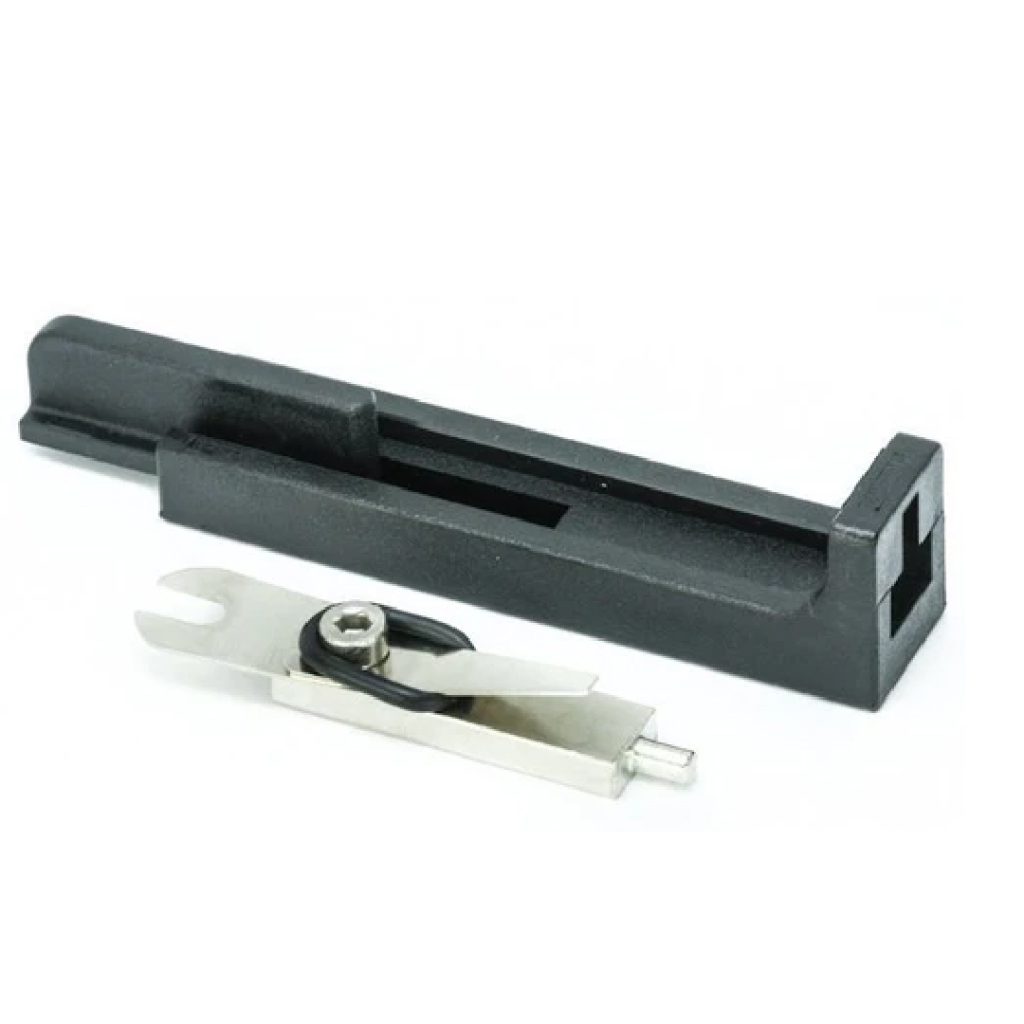
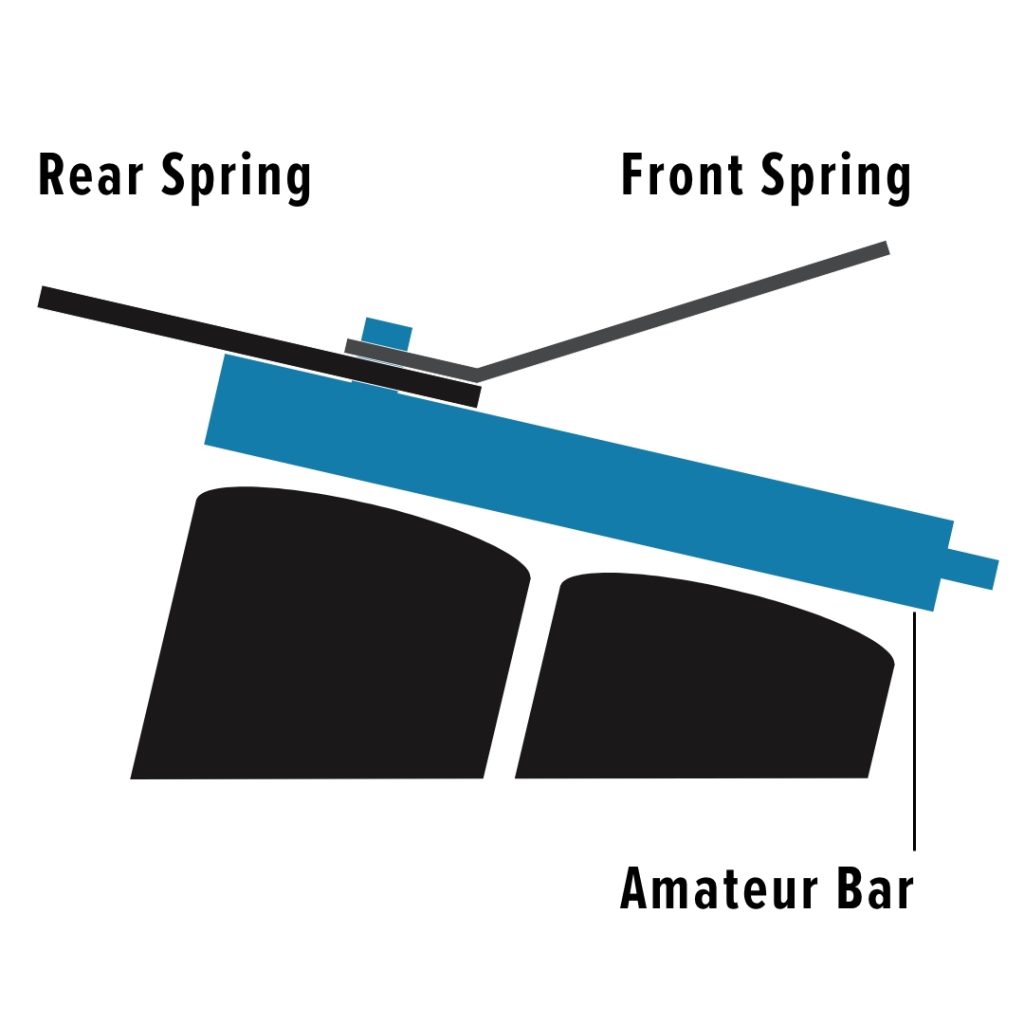
Coil tattoo machine springs might not look like the stars of the show, but in a coil tattoo machine, they’re doing a ton of heavy lifting. Literally. Your machine uses two of them—one front spring and one back spring—and together, they help control the power, precision, and feel of your machine.
Front Springs on Coil Tattoo Machines
The front spring is your smooth operator. It helps turn the coils into an electromagnet and works as a shock absorber for the armature bar. Think of it as the smooth operator that keeps your machine from feeling too punchy and unpredictable.
To shade like a pro, you’ll need a lighter, thinner front spring to help your needles glide without dragging. For bolder work, a thicker front spring delivers more punch. Just don’t overdo it, or you’ll compromise precision.
Back Springs on Coil Tattoo Machines
Back springs keep your needle in your coil tattoo machine moving up and down at a steady rhythm. It’s the real workhorse here: pulling the needle up out of the skin and keeping consistent motion. It also adds tension to the front spring, making sure everything stays in place and functions smoothly.
Getting your spring tension right is super important. Too much tension? You might end up running too fast, skipping fine details, or worse, traumatizing your client’s skin. Too little? Your machine could lag and leave you struggling to get solid saturation.
The goal = finding the sweet spot between spring thickness and stroke length, so your machine runs smoothy and your work looks great.
How to Set Up a Coil Tattoo Machine
Getting your coil tattoo machine springs set up right is all about finding the sweet spot between spring tension, thickness, and stroke length. It’s really a balancing act—but when you get it right, your machine feels like an extension of your hand.

- Thicker springs = more tension = punchier hits
- Thinner springs = lighter tension = smoother shading
- Front + back spring combos = your stroke style
But it’s not just about force, it’s about control.
Spring Specs That Shape Your Stroke
- Want silky smooth shading? Go for lighter tension and longer strokes. A go-to setup for many artists: .016″ front spring and .020″ back spring. That combo helps your needles change direction smoothly without dragging or stalling.
- Doing bold and crispy linework? That calls for a shorter stroke, medium tension, and more power to keep your machine running fast and clean. Try a .020″ front spring with a .018″ back spring for strength up front and enough tension in the back to balance it out.
And if you need your tattoo coil machine to hit harder? Start by adjusting your power, not just cranking up the spring weight. It’s all about dialing in the right parameters for your style (and also the body part you’re tattooing).
Finding Your Sweet Spot
There’s no one-size-fits-all formula for spring size and stroke length combos. Honestly, it really comes down to how you tattoo. That said, it’s usually safer to start with thinner springs and tweak your stroke length from there. Test different setups, listen to your coil tattoo machine, and pay attention to how it responds. The more you experiment, the more you’ll dial in what works best for your lining, shading, filling, and everything in between.

Some manufacturers even offer springs with specific shapes for certain jobs. For example, Baltimore Street Irons makes slightly tapered springs for lining and straighter ones for shading. Cool? Definitely. Critical? Not really. When it comes to customizing your setup, spring thickness and stroke length will give you way more control over performance than shape alone.
Keeping Up with Coil Spring Maintenance
Finding your perfect coil spring setup won’t mean much if you’re working with worn-out or poorly maintained hardware. Or worse—never replacing it at all. That’s how you end up with carbon buildup around your coils, broken springs, and a machine that fights you with every stroke.
To keep your coil tattoo machine running like a dream, give it a solid cleaning and a little lubrication at least once a month. That’ll clear out carbon and other gunk before it messes with your parts—or your tattooing.
Here’s how to keep your coil tattoo machine in top form:
- Stick with non-corrosive cleaners. Green Soap is your friend. Harsh disinfectants might clean off debris, but they can also weaken your springs and invite rust.
- Use a microfiber cloth. Gentle is the name of the game. No scratches = nowhere for gunk or rust to hide.
- Lube it up. A little petroleum jelly goes a long way. Keeps things running smooth and parts from wearing down too fast.

If your springs are beyond saving, no worries. Swap them out with reliable replacements:
- Baltimore Street Irons Front and Back Springs
- Precision Thick Blue Carbon Steel Front Spring
- Precision Thick Blue Carbon Steel Back Spring
To Sum Up
Your coil tattoo machine is only as good as its spring setup. They’re more than just tiny pieces of metal—they’re essential to your machine’s performance. Putting together the right spring combo and maintaining it well will elevate your work, keep your machine running longer, and help you tattoo with more consistency and confidence.
Additional Information About Coil Machines
You’ll find several blog posts and articles about coil tattoo machines and how they work in our Information Center. Here are a few that may be good resources for you: