Thinking of getting a lip piercing? Go for it! But before you stroll into the piercing shop, you’ll need to do a quick vibe check with yourself: What type of lip piercing do you want? Are you ready to commit to the aftercare process? And how exactly will you handle looking so good? The Ultimate Guide to Lip Piercings is here to answer all your burning lip piercing questions.
The 16 Types of Lip Piercings
Yep, 16… and counting. Piercing fans are always dreaming up new spots or clever configurations, so it’s probably only a matter of time before number 17 shows up and steals the spotlight. But for now, here are the 16 types of lip piercings you can walk into a shop and ask for by name.
Upper Lip Piercing Types
Monroe
Marilyn Monroe’s famous beauty inspired one of the most popular lip piercings out there: the Monroe. This piercing sits on the left side of the face, right where Marilyn’s mark was, and the needle goes in horizontally (parallel to the ground, for the geometry fans). Most people rock a labret stud in this spot, keeping it classic but with a little extra sparkle.
Madonna
Want your “Monroe” on the right side instead? That’s called a Madonna. Unlike Marilyn’s, Madonna’s iconic beauty mark was on the right side of her upper lip—hence the inspo for the piercing name.
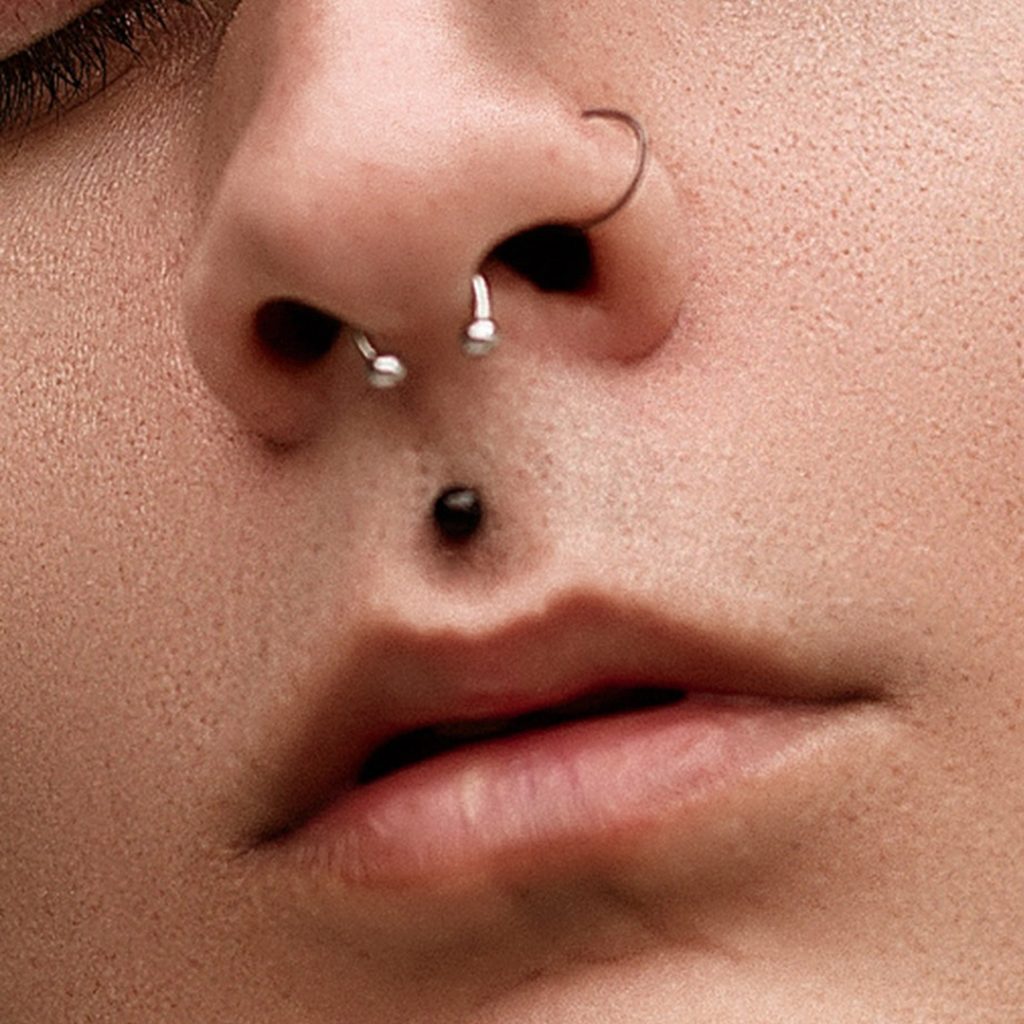
Medusa
A Medusa piercing sits right in the vertical groove above your upper lip—aka the philtrum if you want to get all science-y about it. Like Monroes and Madonnas, it’s done horizontally and usually sports a labret stud for that clean, centered look.
Jestrum
The Jestrum starts in the same spot as a regular Medusa, but instead of going straight back, the needle pops out vertically through the lip itself. The top ball of the curved barbell hangs out in the philtrum, while the bottom ball sits right on the upper lip. It’s like the Medusa’s flashier, more attention-grabbing sibling.
Lower Lip Piercing Types

Labret
The classic labret is as straightforward as it gets—a horizontal piercing just below the center of your lower lip. Most people stick with a labret stud (it’s in the name, after all), but you can switch things up with captive rings, circular barbells, or lip loop labrets if you’re feeling adventurous.
Side Labret
A labret… just scooted over a bit. Side labrets sit on either the right or left side of the lower lip and work great solo or as part of a “bites” setup for extra style points.
Vertical Labret
Unlike classic labrets, which are pierced horizontally, vertical labrets are pierced, well… vertically. This one’s not for the faint of heart, since the needle actually passes through the lower lip itself, which can make it a bit more ouch than other lip piercings. But if you’re going for bold and impossible-to-miss, it’s totally worth it. The top ball of the curved barbell sits right on the lower lip, while the bottom ball rests just below it for a super eye-catching look.
Ashley
The Ashley is kind of like the vertical labret’s twist ending. Instead of the needle exiting beneath the lower lip, it comes out through the back of the lip and into the mouth. The end result? A single, perfectly centered ball sitting right on the lower lip—simple, sleek, and seriously striking.
Lowbret
Lowbrets (short for low labrets) take their spot a little farther down—way below the typical lip piercing zone. Instead of chilling just under your lower lip, they hang out closer to the chin.
Lip Piercing Types
Angel Bites
Can’t choose between a Monroe and a Madonna? Get ’em both. Angel bites are a pair of upper lip piercings, one on each side of the philtrum, giving you double the style and double the attitude.
Cyber Bites
Combine a Medusa with a classic labret piercing, and you have cyber bites. This vertical setup is perfect for turning heads and putting the spotlight right in the center of your face.
Snake Bites
Snake bites are a classic pair of side labrets—one on each side of the lower lip. They’re super popular, probably because they’re so versatile. You can wear labret studs, captive rings, circular barbells, giving you a wide range of looks to choose from.
Spider Bites
Spider bites are another pair of side labrets, but instead of one on each side like snake bites, both piercings cluster close together on just one side of the lower lip. The name’s pretty spot on: they look like a tiny spider’s bite right there on your lip. Creepy? Maybe. Cool? Definitely.
Dolphin Bites
Named for the narrow mouth of a dolphin; dolphin bites are a pair of labrets that sit close together under the center of the lower lip.
Canine Bites
Canine bites get their name from their placement – right where your canine teeth are, with four piercings total. Think Monroe and Madonna up top, plus two side labrets down below. You can keep it simple with labret studs all around, or mix things up with studs on top and hoops or circular barbells on the bottom. Either way, it’s a fierce look.
Shark Bites
Like canine bites, shark bites are another four-piercing setup—but this time, it’s all business on the bottom lip. Two side labrets are placed close together on both sides of the lower lip for a total of four piercings. The name comes from the layered effect that looks a bit like a shark’s razor-sharp rows of teeth.
Dahlia
Unlike most lip piercings, dahlia piercings (aka dahlia bites or joker bites) don’t really play by the usual rules of upper or lower lip. Instead, these piercings sit right next to each corner of the mouth, channeling either the Joker’s signature scars or the infamous Black Dahlia slashes.
Get more details on each type of lip piercing in our guide to Lip Piercing Options.
Lip Piercing Gauges: Stretch It Out or Go Big Right Away?
Most lip piercings start out at 16g or 14g. Want to go bigger? You’ve got options! But patience is key here.
Once your piercing is fully healed (and we mean fully healed), you can start stretching it out. The gentlest way is called the wrapping method: take out your stud, wrap it with a layer of stretching tape, pop it back in, and let it chill for a week. Then repeat until you hit your desired size.
If you’re feeling a bit bolder, you can jump up a full gauge size at a time. Just be sure to give your lip plenty of healing time before moving up again. This means about one and a half times longer than it took for your original piercing. Slow and steady wins the stretch!
Lip Piercing vs. Punching
If patience isn’t your thing, you can ask your piercer to start you off with a larger gauge needle. Just make sure they’re pros with the bigger needles because healing can take longer.
The most extreme route? Going big from the jump with a dermal punch instead of a needle. Instant gratification, yes—but with some trade-offs. Needles part the skin, while punches remove a little circle of flesh. If you later want to downsize your piercing, it’s way easier if you started with a needle. Punching also ups the chance of noticeable scarring if you decide to retire the piercing later on.
Which lip ring is right for me?
When it comes to lip rings, there’s a huge range of styles—but really, the jewelry fits into three main categories:
- Labret Studs: The classic go-to for most lip piercings. Comfortable, versatile, and way more stylish than basic. Our labret studs come in tons of unique styles so you can match your vibe perfectly.
- Captive Bead Rings: Great for most lower lip piercings and a solid way to switch up your look without going overboard.
- Circular Barbells: Perfect for vertical labrets and Jestrum piercings—and popular for lower lip placements too. Segment clickers (a type of circular barbell that snaps closed) are a favorite for lower lip piercings because they’re easy to use and look sleek.
So… Do lip piercings hurt?
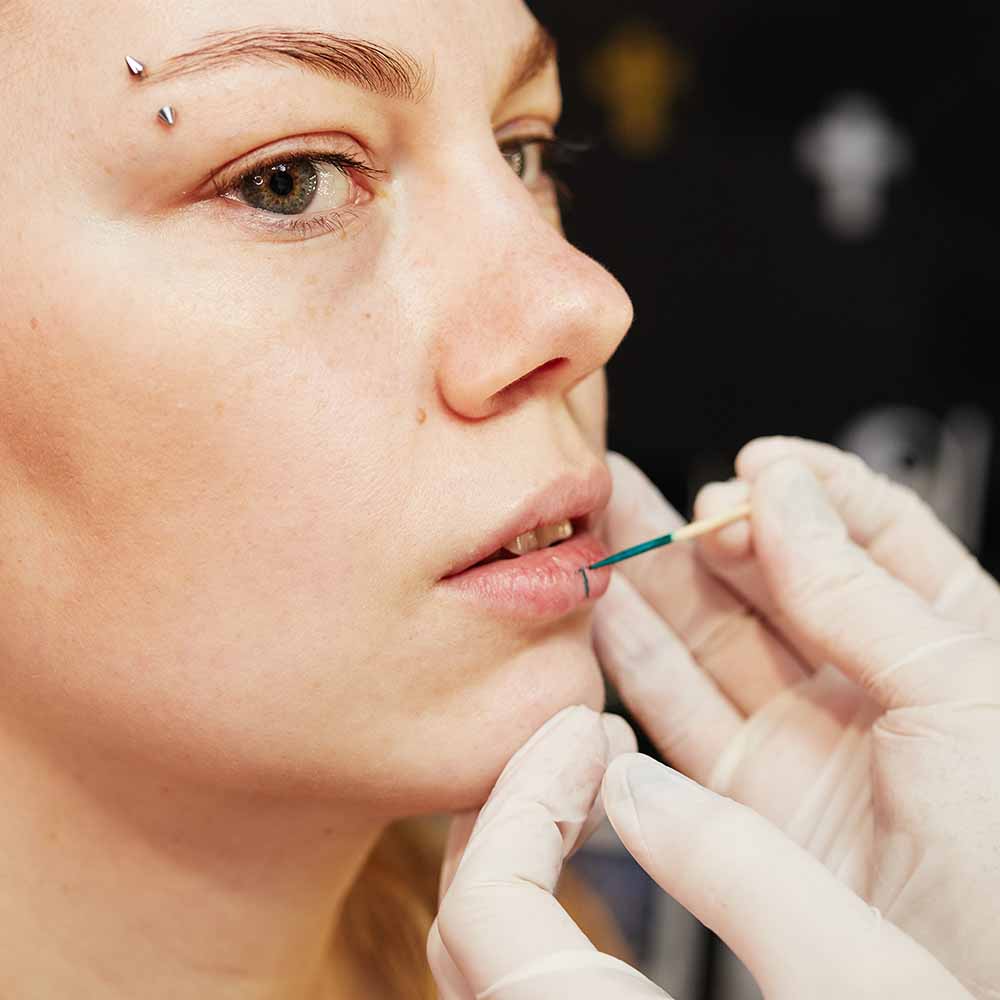
Well…sure. But here’s the thing: most people say it’s not as bad as they feared. How much it hurts really depends on your personal pain tolerance and the type of lip piercing you choose. Piercings that go through the lip itself, like Jestrums and vertical labrets, tend to be a bit more ouchy.
How long does it take a lip piercing to heal?
Most lip piercings heal up in 6 to 8 weeks. But some, like Dahlia bites, Monroe, and Medusa piercings, can take 3 months or more to fully settle in. Healing time varies person to person, depending on how well you stick to aftercare and whether you run into any hiccups along the way.
Signs Your Lip Piercing Is Healing Like a Champ
Expect some pain, swelling, and a little bleeding in the early days—that’s totally normal. If those things gradually calm down, you’re on the right track. You might also notice some clear fluid that dries into crusties around your piercing. That’s lymph fluid, your body’s natural healing juice, not pus. So don’t freak out.
Lip Piercing Problems to Watch Out For
Follow your aftercare routine, and most lip piercings heal just fine. But sometimes, things can go left:
- Embedded lip piercing: This happens when skin starts growing around your jewelry. It can get painful and tricky to remove if ignored. If your ring looks like it’s sinking into your skin, try gently wiggling it and call your piercer. You might need a bigger barbell if your jewelry’s too small.
- Rejection: Your body might decide it doesn’t want the piercing and slowly push it toward the surface, eventually forcing it out. If your ring looks like it’s getting pushed out or more visible than before, talk to your piercer. Better to take it out before it leaves a scar.
- Scar tissue: Any piercing risks scarring. To keep it minimal, choose a skilled piercer, avoid fiddling with your jewelry, and stick to aftercare.
- Swelling: Some swelling is normal at first. But if it sticks around too long or spreads, check with your piercer or doctor. Metal allergies can cause swelling too—switching to titanium or niobium might help.
- Bumps: Small bumps around piercings are common and usually harmless. They’re just your body’s inflammation as it heals and usually fade on their own.
How to Keep Your Lip Piercing Clean and Happy
Aftercare is everything. Here’s what to do:
✅The Do’s
- Spray the outside of your lip piercing 3-6 times a day with a saline-based rinse like Recovery Saline Wash.
- If your lip piercing has an oral side, rinse your mouth with an alcohol-free sea salt mouthwash 3-6 times per day, especially after eating.
- Do two 5-minute sea salt soaks daily: soak a cotton ball, hold it on the piercing for 30 seconds, replace with a fresh one, and repeat until the external side’s saturated for 5 minutes total. Then swish sea salt mouthwash in your mouth for about 5 minutes.
- Protect your piercing from trauma. Brush and floss gently, avoid banging or snagging, and don’t play with your jewelry.
- Eat soft foods like oatmeal, Jell-O, mac & cheese, soup, and yogurt during the first week or two. Take it slow when chewing!
- Gently remove crusties by soaking them with piercing aftercare spray and gently wiping with a clean tissue.
- If the skin around the piercing feels dry, moisturize with tea tree oil. Skip creams or balms that can trap bacteria.
🚫The Don’ts
- Don’t twist or move your jewelry to loosen crusties—this can push bacteria in and cause infection.
- Say no to alcohol-based mouthwash—it dries out your piercing and slows healing.
- Avoid French kissing, oral sex, sharing food or drinks, chewing on foreign objects, or swimming in public pools while healing. These can irritate your piercing and introduce bacteria.
- Avoid touching your jewelry unless you’ve just washed your hands thoroughly.
For even more details and tips, see our full Lip Piercing Care Guide.
Changing lip piercing from stud to ring
Changing your lip jewelry for the first time can be tricky—don’t rush it! Make sure your piercing is completely healed before swapping studs for rings or vice versa.
Start with freshly washed hands. Hold the barbell steady with one hand, unscrew the ball with the other, and gently slide it out. For rings, open the ring, thread one end through the piercing, then close it securely. Internally threaded rings are a great pick since they’re less likely to scratch your piercing.
And remember, you can always swing by your piercing shop to have a pro check your healing or help swap your jewelry.
Get Everything You Need for Your Lip Piercing
From aftercare sprays to the coolest selection of lip rings online, Painful Pleasures has you covered with all the essentials to keep your piercing looking and feeling great.


Comments are closed here.